If you are logged into your account on edudip.com, you will first see your overview page, also called “Dashboard“. In the dashboard-area click on “Create new webinar” on the blue button in the upper left corner of your browser-screen.
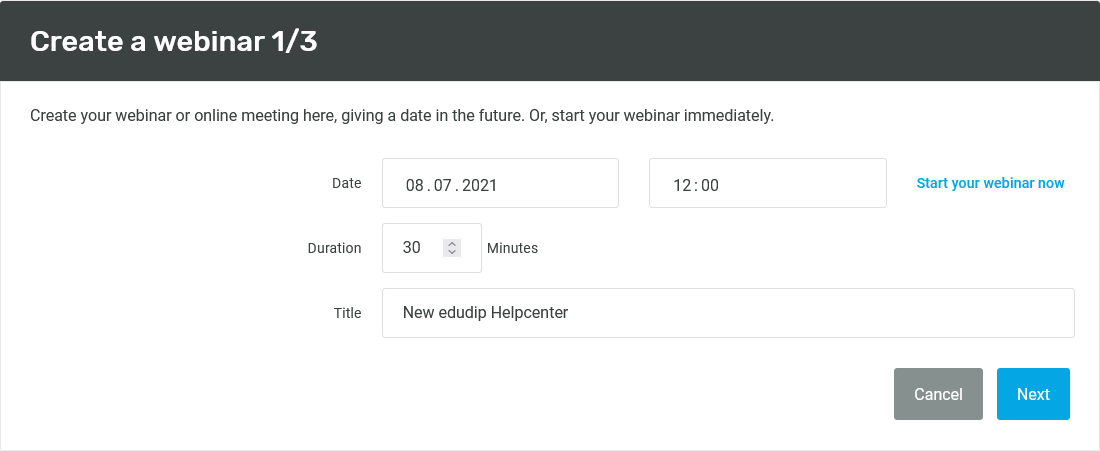
- Create a webinar – Step 1:
- Here you are able create a webinar with an appointment in the future or, alternatively, start the webinar immediately. Enter the necessary data such as the date, time, duration and title of the webinar.
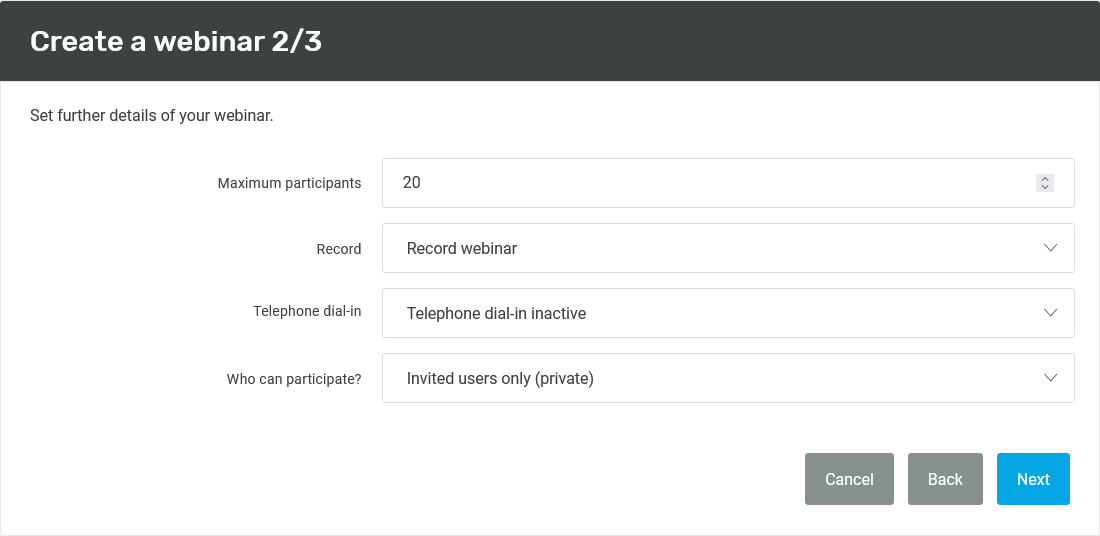
- Create a webinar – Step 2:
- In the second step, you decide the maximum number of participants for your webinar. Depending on your edudip next subscription, up to 500 participants are possible.
- You should activate the recording function in advance if you want to record the webinar and make it available to your participants afterwards. If the webinar has already started, activating our recording system is currently no longer possible.
- If you enable “telephone dial-in“, participants are able to also follow the webinar over the phone.
- Determine whether everyone with the link or only invited users are able to participate in your webinar and select the desired language setting. The language setting is important for which language of your mails, the landing page, terms and conditions and imprint as well as the lobby text will be displayed.
- Create a webinar – Step 3:
- This step will only be shown if there is more than one possible moderator set in your account. In this area you are able select the main moderator for the webinar. After you have added all the necessary information, your first webinar has been created and you can access and edit it at any time via the “Webinars“ item in the menu (left) or access it directly after saving your newly created webinar.

–> continue with Edit & manage webinars